Most of the exercises below have a considerable number of options that differ from those illustrated in the given figures. Variables include: the initial position of the exerciser, its location in regards to the body, the plane of motion, and the way the handles are gripped. That is why the description of each exercise is followed by the information given in brackets concerning its possible modification by changing any of the above parameters. To effectively describe the modified exercises the following symbols should be considered:
- Basic Initial Position of the exerciser (IP): 1-in front of the body; 2-behind the back; 3-overhead; 4-on the side.
- Location of the exerciser (LE): 1-at the waist level; 2-at the breast level; 3-at the head level; 4-overhead.
- Main planes of motion (MP): 1-horizontal; 2-vertical-transversal; 3-vertical-longitudinal; 4-intermediate planes.
- Main modes of gripping the handles (HG): 1-with the thumbs turned to the body of the exerciser; 2-with the thumbs turned from the body of the exerciser; 3-one thumb turned to and the other one from the body of the exerciser.
EXERCISE 1
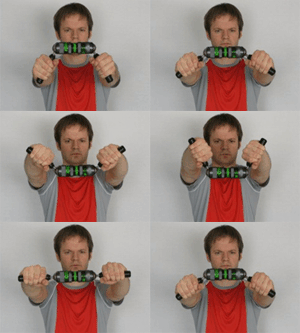 |
Rotate the handles in a vertical plane up-down (the exercise may have some versions with the initial position behind the back, overhead, on the side (IP 1-4); With various locations of the exerciser: at the waist, at the breast, at the head levels and overhead (LE 1-4); movements can be exerted in different planes: horizontal, vertical-transversal and intermediate planes (MP 1-4); the exercises may differ in the way the handles are gripped: with thumbs turned to or from the body of the exerciser, with one thumb to and the other from the body of the exerciser (HG 1-4). |
EXERCISE 2
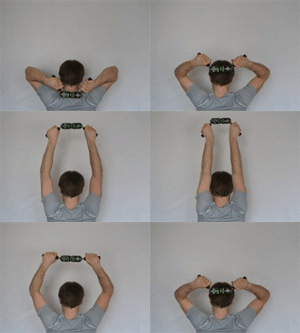 |
Move the exerciser upwards simultaneously rotating the handles downwards. Get back to the initial position in reverse order (IP 1-4; LE 1-3; MP 1-4; HG 1-3). |
EXERCISE 3
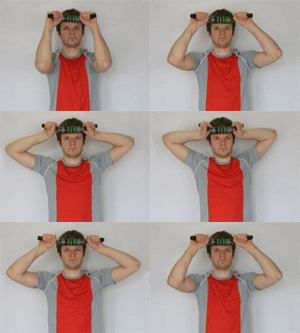 |
Rotate the handles of the exerciser onwards in a horizontal plane; simultaneously bring the elbows to the utmost front of yourself and then backwards (IP 1,2; LE 1-3; MP 1,2,4; HG 1-3). |
EXERCISE 4
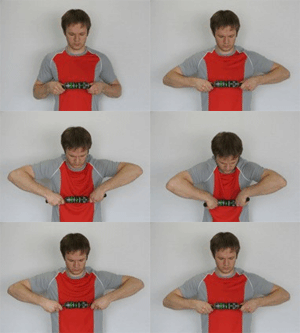 |
Rotate the handles of the exerciser onwards in horizontal plane, simultaneously bring the elbows to the utmost in front of yourself and then backwards to the farthest point behind the back (IP 1,2; LE 1,2; MP 1-4; HG 1-3). |
EXERCISE 5
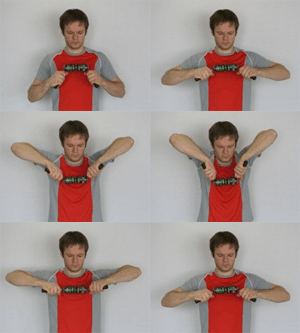 |
Rotate the handles of the exerciser in a vertical plane upwards with elbows up and down to the farthest points. (LE 1-3; HG 1-3). |
EXERCISE 6
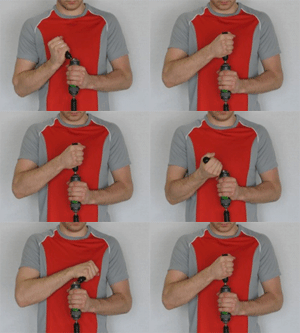 |
With one hand gripping the exerciser’s body and the other grasping the handle, rotate the handle in all possible directions (IP 1-4; LE 1-4; MP 1-3). |
EXERCISE 7
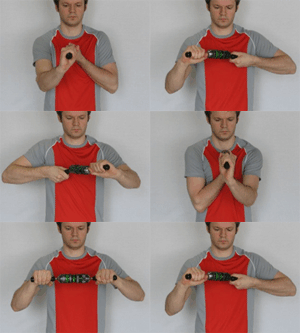 |
Rotate the handles along their longitudinal axes, perform movements simulating twisting a wet cloth. Get back to the initial position in a reverse order (IP 1-4; LE 1-4; MP 1-3). |
EXERCISE 8
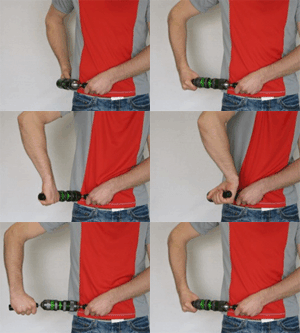 |
With one of the handles firmly fixed to the user’s body, rotate the other handle onwards and backwards behind the back together with the exerciser’s body, while simultaneously moving the elbows in the same directions (IP 1,2; LE 1,2,4; MP 1-4; HG 1-3). |
EXERCISE 9
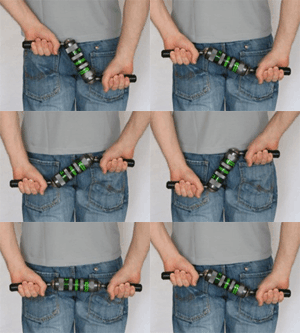 |
Move the upper handle downwards and the lower handle upwards in parallel directions (IP 1-4; LE 1-4; MP 1-4; HG 1-3). |
EXERCISE 10
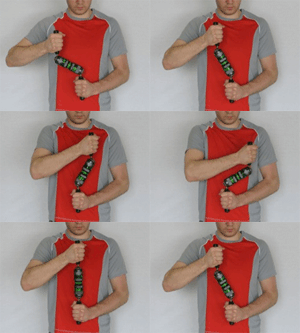 |
With one of the handles firmly fixed to the body, move the other handle to the right and left in parallel direction (IP 1,2,4; LE 1,2; MP 1-4; HG 1-3). |
EXERCISE 11
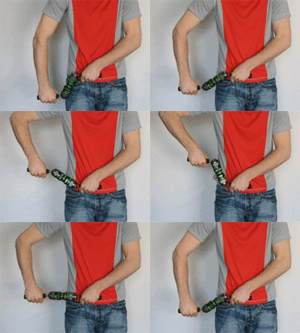 |
With one of the handles firmly fixed to the body move the other handle up and down, keeping them parallel (IP 1,2,4; LE 1,2; MP 1-4; HG 1-3). |
EXERCISE 12
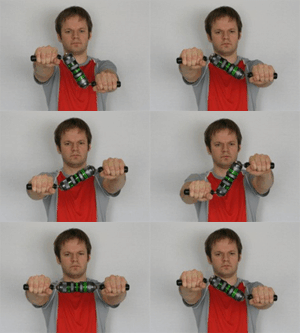 |
With arms straightened, move the upper handle downwards and the lower handle upwards, keeping the handles parallel (IP 1-4; LE 1-4; MP 1,2,4; HG 1-3). |
EXERCISE 13
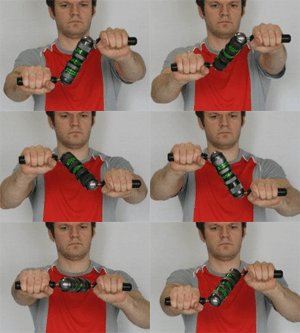 |
*Move the handles in parallel planes simulating bicycle pedaling (IP 1-4; LE 1-4; MP 1,2,4; HG 1-3). |
EXERCISE 14
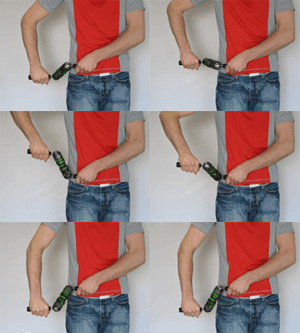 |
*With one of the handles firmly fixed to the user’s body, rotate the other handle simulating brace movement. The handles should remain parallel (IP 1,2,4; LE 1,2; MP 1-4; HG 1-3). |
EXERCISE 15
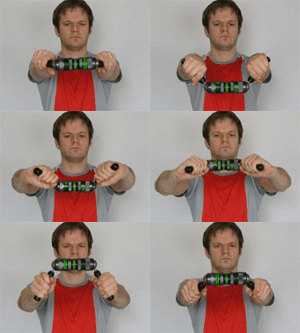 |
*Perform cone-shaped rotation of the handles simultaneously moving the exerciser’s body onwards-backwards (IP 1-4; LE 1-4; MP 1-4; HG 1-3). |
EXERCISE 16
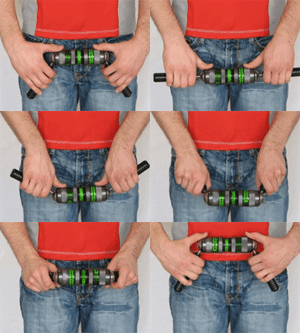 |
With thumbs against the exerciser’s body, grip the handles with the four fingers of both hands and rotate them upwards; get back to the initial position rotating the exerciser along its longitudinal axis. |
EXERCISE 17
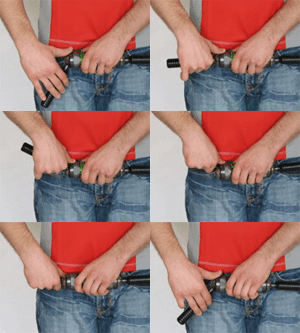 |
One hand holds the exerciser’s body; the other hand with the thumb against the body grips the handle with one, two or three fingers. Rotate the handle upwards, get back to the initial position, rotating the exerciser along its longitudinal axis. |
EXERCISE 18
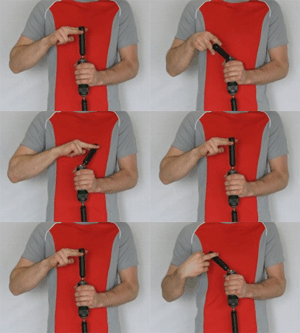 |
*One hand holds the exerciser’s body and the handle is located between the fingers of the other hand. Gripping the handle by the fingers rotate the handle in different directions. |
*Apply low and moderate loads.
TRAINING PROCESS
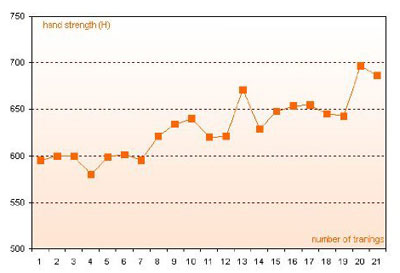
Like any other sports, you should always start your training exercise by a smooth warming-up.
With “Bison-1M” warming-up is a beautiful experience as it moves smoothly all your forearms muscle in just few minutes you start feeling the heat of the work out.
It is important for us to take into consideration the age, physical fitness, and state of health of the exercising individual.
AND
To master the exerciser and see optimal results, it is recommended that an individual use the exerciser 3 times per week minimum.
During strength training, concentrate on maximum muscle strength accumulation and on the development of power endurance.
To accumulate maximum muscle strength from the exerciser, the load offered should be high enough for the athlete to perform 6-12 repetitions of the exercise at a minimum possible rate.
To develop power endurance, the number of repetitions should be 20 at a minimum.
The load used throughout the exercise should leave the individual with muscle fatigue at the end of the exercise. This regimen can be applied to train the cardiovascular system along with strength training.
To increase speed and strength parameters, you should repeat the exercises 6-15 times before upgrading to a higher resistance level. Before upping the resistance level, an individual must be able to rotate the handles at a fast pace at the current resistance setting.
It is recommended that the athlete perform 5-6 sets of every exercise, with 1-3 minute intervals of active rest in between sets. A partner may be helpful in holding the exerciser. This will facilitate or complicate the movements being practiced. Individuals demonstrating high or insufficient levels of physical fitness are trained by means of increasing or decreasing the physical loads offered by the exerciser and the suggested number of sets and repetitions.
STRETCHING EXERCISES
FINGER & WRIST STRETCH
Benefits:
- loosens stiff fingers; hands and wrists
- Completed daily for a few months, hands will become more flexible
Step 1: Starting with the right hand gently extend the fingers back one by one.
Step 2: Then take them all back at the same time. This helps to stretch open your palm. Repeat several times.
Step 3: Take your thumb back towards your wrist. Then bring it forwards, stretching gently and firmly. Never force it.
Finish by making a fist and slowly opening it, stretching your fingers and thumb out as far as you.
Step 4: Put your palms together, fingers pointing upwards, as if you were praying. Stretch your fingers and press palms together strongly. Keep the base of your palms pressing together, as you gradually lower your hands until your lower arms are horizontal.
Step 5: Then take your hands down still further, fingers and upper palms together. You should feel the stretch on the insides of your fingers and wrists. Hold for a few seconds, and then repeat.
HAND, WRIST, AND FOREARM STRETCHES
Here is a series of stretches for the hands, wrists and forearms. If you have RSI-type problems, do not do any of these that cause pain.Proceed with caution. If you do not have an RSI-type problem, we recommend you follow this routine as preventive medicine.
